Friday, February 28, 2014

February Round-Up

This has been a busy month for creating. Lots of baking and sewing and of course, the little one created lots of artwork, too. 

At the beginning of the month, I finished up two projects for my son: #100itemcraftstashchallenge projects 4-23 and project 25. Right now, he just uses the number recognition squares to tile the floor and make it pretty. But eventually we're going to learn the number 0-9!

At the beginning of the month, I also finished up a project for my husband: #100itemcraftstashchallenge project 24. Surprisingly, he was happy with it and it's used daily. So no more lost remotes!

The last sewing project of the month was a surprise #100itemcraftstashchallenge project that will be revealed on Monday in the weekly post. So stay tuned for that! 

In between making stuff for my family, I worked on coasters to be listed in the Storenvy storefront - make sure to check those out! New coasters are added each week. A super cute custom shirt was created for a friend's little boy for his second birthday, as well.

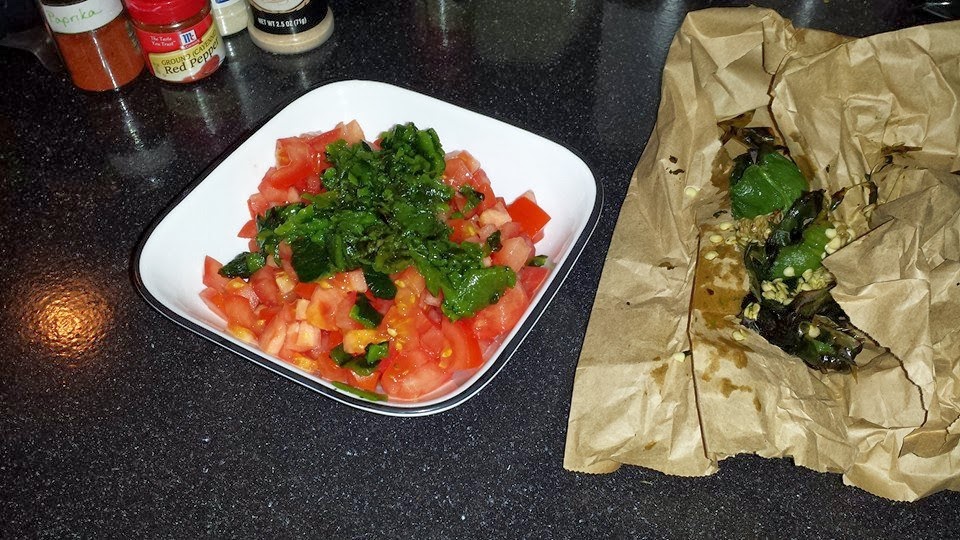
We also did lots of baking and cooking this month, there were three recipes posted this month: pizza, queso dip and Funfetti cupcakes. What kinds of recipes would you like to see us share in the future?

Wednesday, February 26, 2014

Recipe Wednesday: Homemade Funfetti Cake

This is the basic yellow cake recipe from my KitchenAid stand mixer's manual/recipe book. I know that store bought Pillsbury original is a white cake mix, but I'm too lazy to separate eggs, so I just use the yellow cake mix. 
My son is a huge fan of Monsters, Inc and Monsters University, so when I saw some sprinkles in the grocery store that made me think of Sully, I asked him if he wanted a Monsters birthday cake. He got excited and nodded excitedly (I think this was just a response to seeing the container of sprinkles though). And then I let him pick some candles, he chose some dinosaur shaped ones. If it isn't obvious yet, he loves to roar.  I then let him help pick out some frosting and he chose the bright blue Pillsbury Funfetti frosting.

Quick Yellow Cake
Ingredients
2 1/4 cup all-purpose flour
1 1/3 cup sugar
3 tsp baking powder
1/2 tsp salt
1/2 cup shortening
1 cup low-fat milk
1 tsp vanilla
2 eggs

Directions (modified from original recipe)
1. Preheat oven to 350°F. Combine dry ingredients; add shortening, milk and vanilla.
2. Mix ingredients until wet and add eggs.
3. Pour batter into cupcake liners. Bake for 15-22 minutes, cupcakes are done when toothpick inserted in center comes out clean.
4. Cool completely on wire rack; frost if desired.
Dry Ingredients
Sprinkles for a Monsters, Inc inspired cake and wet ingredients
I dumped the whole container of sprinkles into the batter for the Funfetti effect
Ready for baking!
Frosted, sprinkled and candled, ready for partying!

Everyone except for the birthday boy enjoyed the cupcakes. He didn't eat any cake on his first birthday and he only got upset about the frosting on his fingers this year, he refused to even try the cake. Who knows, he may never like cake or he might like it for his third birthday? Although, he did pick out a chocolate cupcake with chocolate frosting on it from the Barnes & Noble café for his free Cheesecake Factory cookie or cupcake, so maybe it's just that he was given a white cake for his first birthday and a yellow cake for his second? Because he ate most of his B&N cupcake until his daddy said no more cupcake so that he'd eat his dinner.

Monday, February 24, 2014

#100itemcraftstashchallenge: Project 24

For project 24 of the challenge, my husband had requested that I make him a remote caddy that could be hung. I only had the two remotes for a "pattern" to make the remote caddy. I found a piece of fabric in my scraps bin that looked like it would be big enough and started making up the caddy as I went along. Here's a photo of the finished project, after the photo I'll explain more how I made it.
First, I folded the fabric in half lengthwise and then folded it almost in half a second time, but this time widthwise. Using this estimated pouch, I then folded the ends of the back and the pocket to hem the fabric and prevent fraying. After sewing the hem of the pocket only, I pinned the pocket to the back and used a zigzag stitch to sew along the entire square of the pouch - this hemmed the back of the pouch as well. I then used a straight stitch to sew straight up the middle of the pouch to create two pockets for the remotes. To hang it, I used iron-on hem adhesive to attach the ribbon. Since it was afterthought, I didn't sew it on for better stability. If I were to make a second one, I would sew the ribbon (or other hanger) onto the pouch to create the hanging remote caddy.

Remember that project 25 was shown off in this post here.

Come back next Monday for project 26!

Friday, February 21, 2014

Feature Friday: Soup Kitchen Candles, LLC

I decided at the last minute yesterday afternoon that I would do a small business feature on Fridays and name the post: Feature Friday. I haven't decided yet if it's going to be a weekly feature or biweekly.

I decided to choose one of my favorite small businesses to feature in the first Feature Friday post: Soup Kitchen Candles, LLC. The woman behind SKC is Barbara and she's such a sweet and friendly person, it makes returning to her company an easy choice. Especially once you get one of their products!

Here's a little blurb she sent me for use in this post:

SKC handcrafts generously scented soy candles and melting tarts using organic, Non-GMO, long and clean burning soy wax and only cotton core wicks. All of their scents are phthalate and nitro musk free!  An important health benefit!

There is a huge variety of scents available for purchase. Some of the most recent ones I've seen debuted are Fresh Apples, Maple Bacon and Fried Chicken! Each melting tart is beautifully crafted and so are many of the candles. I like the recycled and painted aluminum cans that many of the candles feature, also. I think the green factor is a pretty awesome selling point, as is the giving back from each sale.

An example of the artistry put
into the candles
I have the apple pie soy mini pie melting tarts, the java coffee soy melting tarts, a pumpkin spice soy melting tart, a pineapple upside down cake soy melting tart and spiced cider soy melting tarts. And I have some gingerbread soy melting tarts, some oats and honey soy melting tarts and some CocoMango soy melting tarts on the way! I am the most excited for the gingerbread ones since I'm the only one in my house who will eat gingerbread, so making it is a waste. At least this way, I will be able to have the yummy scent in my house.  Of the ones that I already have, my favorite is the java scent. I am that weird person who doesn't like to drink coffee, but loves, loves, LOVES the smell of coffee. So the melting tarts are amazing!

I don't own any of their candles, because we don't burn candles in the house - seems dangerous with a very active, very wild two year old boy. My mom though, has two of the gingerbread soy candles and I got to experience them at Thanksgiving (non-burning) and at Christmas (burning). There was no visible smoke (meaning their advertising is true to word!) and the smell was subtle, but noticeable - even among the scents of my mom's holiday cooking. They were perfect candles in my opinion. Not too overpowering, but not so weak that you couldn't notice the fragrance.

Where appropriate, I included links to the products I have experience with and below, I will provide the links to their website, Etsy and Facebook page. I hope you will check them out and consider purchasing something!

Soup Kitchen Candles, LLC - http://www.soupkitchencandles.com/

Wednesday, February 19, 2014

Recipe Wednesday: Queso Dip Nachos

I originally found this copycat recipe over on the The Cooking Photographer blog when I had a craving for qdoba queso a few weeks ago. We couldn't find cooking creme at our grocery store, so we substituted regular cream cheese and some milk (while the result was edible and even good, it was a little off lol). This time we planned ahead and stopped at Trader Joe's to pick up some of their Creme Fraiche - and the resulting queso was so much better!

COPYCAT QDOBA QUESO
Ingredients
2 poblano peppers
10-ounce container Philadelphia Cooking Creme
8-ounce package Mexican Blend Shredded Cheese
2 medium tomatoes, chopped fine
1/2 teaspoon garlic powder
1/2 teaspoon onion powder
1/2 teaspoon salt
1/4 teaspoon sweet paprika
1/4 cup minced cilantro
1/4 cup water
Cayenne pepper, to taste

Directions
1. Place peppers on a hot grill or under a broiler. Blacken the skins on all sides. Place them in a paper bag and roll top down to seal. Set aside until cool to touch, about 30 minutes. Peel off skins and discard seeds and stems. Chop peppers very fine.
2. Add chopped peppers, cooking creme, cheese, tomatoes, garlic powder, onion powder, salt and paprika to a medium size pot and stir over low heat until cheese is melted.
3. Add the cilantro, water and cayenne pepper and stir for another minute or so until it thickens to preference.
4. Turn off heat and serve immediately as a dip or sauce.

Ingredients and printed out recipe
Blackening the poblano peppers under the broiler
My blackened poblano peppers
Poblanos resting in paper bag; while they rested, I cut the tomatoes
Small vine ripened tomatoes, I used three
(I wasn't sure which knife to use.)
As finely diced as I could get the tomatoes
My skin removed poblanos. As you can see, I lost some of the pepper. Oops!
Diced tomatoes and poblano peppers
What Step 2 looked like
Water, cayenne and sprinkle of dried cilantro
The taco seasoned ground turkey breast used in our nachos
Assembled nachos! (Chips on the side, of course.)

Monday, February 17, 2014

#100itemcraftstashchallenge: Projects 4-23

For my next challenge project, I kind of blurred the lines on labeling projects. I wanted to count it as one since it's a set, but there are 20 involved pieces to it. And since I'm getting antsy on not buying any new fabric or supplies, I chose to number each square individually.
The finished project is a numbers recognition activity for my son, he hasn't seen it yet because it's a gift for his second birthday this coming Sunday. Each square is a grey/white large chevron backing and the number side is a red background with a patterned appliqué number, 0-9. There are two of each number for later on when it can be used a memory game.
numbers view of all 20 squares
front and back view of the "4" square
I have a set of shapes recognition squares ready for the turn and topstitch step. I hope to be sharing those here in two weeks.

Come back next Monday morning for project 24!

Friday, February 14, 2014

#100itemcraftstashchallenge: Projects 1,2 and 3

After sharing the latest project completed for the #100itemcraftstashchallenge earlier this week, I received comments on our facebook page about sharing the first projects in another blog post. But first, I think I need to clarify what the challenge actually is. At the beginning of January, in a crafting group I'm a part of on facebook, I saw another crafter mention stash busting challenge that she'd recently read about. It sounded like something that could be a lot of fun because it would use up the supplies I bought just because and it would force me to be creative. Something I was feeling in a slump about. The challenge was worded as follows:
A crafting challenge to make 100 items from your stash of supplies without buying any new materials until you've made the 100 things (unless it's for a custom order, then go ahead and buy new supplies).
So I decided that I would try and complete the challenge. I started with a  pair of crayon mini crayon rolls. The first one is glittery purple satiny fabric with brown accents and the second is a bright pink denim fabric with brown accents. My friend had done a trade with me at Christmas and I felt that the trade was not evenly done (she way underpriced herself), so I wanted to thank her for her amazing job. I thought a fun item for one of her kids was a the perfect choice. Unfortunately, the pink one ended up with a little bit of a wonky corner.
For project #3, I put together a pocket diaper for another friend. She's having a little girl this March and wanted some girly diapers for her little girl. I used the cupcake print PUL from Babyville, cream alova from Diaper Sewing Supplies heart snaps from kam snaps.

Come back on Monday for projects 4-23!

Wednesday, February 12, 2014

Recipe Wednesday: Pizza

Normally, the Recipe Wednesday post will be a post about cooking with my two year old son, but he was more interested in Jelly Belly jelly beans and birthday cake Oreos last night than helping make dinner.  (P.S. He did eat his dinner after that snack.)

I originally found this no yeast recipe for pizza dough on Cooks.com, but after the first attempt at following the recipe as written, I decided to play around with it and what I'll share below is the revised recipe I normally follow. So far, there have been no complaints about the taste of the pizza and we prefer it over carry-out or frozen ready made pizza!

NO YEAST PIZZA DOUGH
Ingredients
2 1/2 Cup all-purpose flour
2 3/4 tsp baking powder
1 tsp salt
1 tbsp olive oil
A generous sprinkle of Italian seasoning blend
A generous sprinkle of Parmesan, usually equivalent to about 1/3 cup
1 cup warm water

Directions
1. Mix dry ingredients; add water and oil.
2. Stir until it forms a ball. If dough is stiff, add more water.
3. The dough will be soft, not sticky. If too sticky, sprinkle a little flour and mix some more.
4. Knead on a floured surface for 3-4 minutes. (I usually skip this step and just knead it right on the pizza stone for a minute or two, and then roll it as flat as I want it.)
5. Top with your favorite pizza toppings.
6. Bake at 400°F for 15 minutes.
Ingredients
Measuring cup and sppons
Pizza stone, rolling pin and pizza toppings
Dry ingredients placed in mixing bowl
Pizza dough rolled flat
All ready to go in the oven!
I thought that I took a picture of the pizza after pulling it out of the oven, but I can't find where I saved it. So it's possible that I didn't take a picture and only thought that I did! If I find it later, I will update this post with the baked pizza. 

Monday, February 10, 2014

Welcome to the new blog!

Hi everyone and welcome to the new blog! I'm Ashley Nicole, the Work at Home Mom (WAHM) behind Stitches by Ashley Nicole. I have been with my husband since February 2009 and we a two year old little boy, PGS, and we have a second child due in August 2014.
I'm currently working on a challenge to complete 100 projects only utilizing supplies from the stash of craft materials you have on hand. This morning, I completed item #25 for the challenge: a leash and collar for my son's stuffed German Shepherd.
The dog is nearly as big as he is and I think it originally belonged to my younger sister. The leash and collar are made from recycled shoe laces and kam snaps. It was a quick no-sew project that took 5 minutes or less while my son at his breakfast. :)